AICtools
Deprecated
This tool is not currently being actively developed.
- For mosaicing/compositing see a more complete and up to date project can be found here.
- For trained classification there are several tools available in both QGIS and ArcGIS
Introduction
AICtools is a GIS workflow and set of tools to facilitate Automated Imagery Classification (AIC) and analysis of surface features over time.
Tools
The tool set consists of several separate modules that comprise, at a high-level, the processing steps of a trained classification time series analysis.
- Data acquisition and pre-processing
- EarthExplorer Metadata CSV filter/processor (Python, pandas)
- Bulk tarball extraction script (Bash)
- Bulk composite Landsat Band TIF products into multiband rasters, store in ArcGIS File Geodatabase (Python, arcpy)
- Assemble multiband rasters into mosaic, remove NoData, and clip to user defined extent of interest (EOI) (ArcGIS Toolbox model)
- Classification/Analysis
- Extract and summarize area change over time of classes in satellite imagery. (ArcGIS Toolbox model)
- Similar to area, except that the area of interest (AOI) is constant and the NDVI trends are calculated (ArcGIS Toolbox model)
Files
AICtools consists of:
- aict-metadata_filter.py
- aict-extract_scenes.sh
- aict-bulk_composite.py
- AICtool.tbx
- Build Mosaic
- Create AOI Mask
- Area Trends
- NDVI Trends
Workflow
The AICtools workflow is designed to give the user lots of flexibility in their analysis approach. It also requires intermediate steps between direct application of the tools: interacting with the USGS EarthExplorer online search and bulk download functions, and also building of the classification training samples.
The general approach is described below, using Landsat imagery and the USGS EarthExplorer as a use case.
1. Data acquisition and pre-processing
- Use the USGS EarthExplorer search feature (location shape or WRS Path/Row ranges, time range and months of interest, cloud cover, collection type) to get a rough listing of available scenes
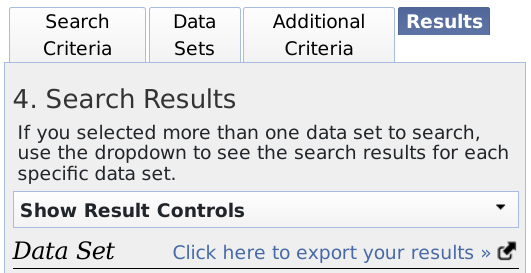
- Download the scene list (metadata CSV, see figure below); you will need to register an online account to access the metadata, as well as the GeoTIFF products for download later
- CSV is at the "Click here to export your results" link

- Use aict-metadata_filter.py to fine-filter the scene list
- Currently, the primary function that this script performs is to return a file that contains Landsat Product IDs that satisfy the following criteria:
- Provide full coverage of the study region (for cases where the study region spans multiple scenes)
- Scenes must be from the same time range (e.g. June-September) and are grouped by year of capture, thus providing a full picture of the region during a specific time period in a single year
- If multiple scenes are available that satisfy the above criteria, then the scenes with least cloud cover are selected
- Only years that have full coverage are selected
- All the scenes that pass are output to a text file, which is used to perform a bulk download
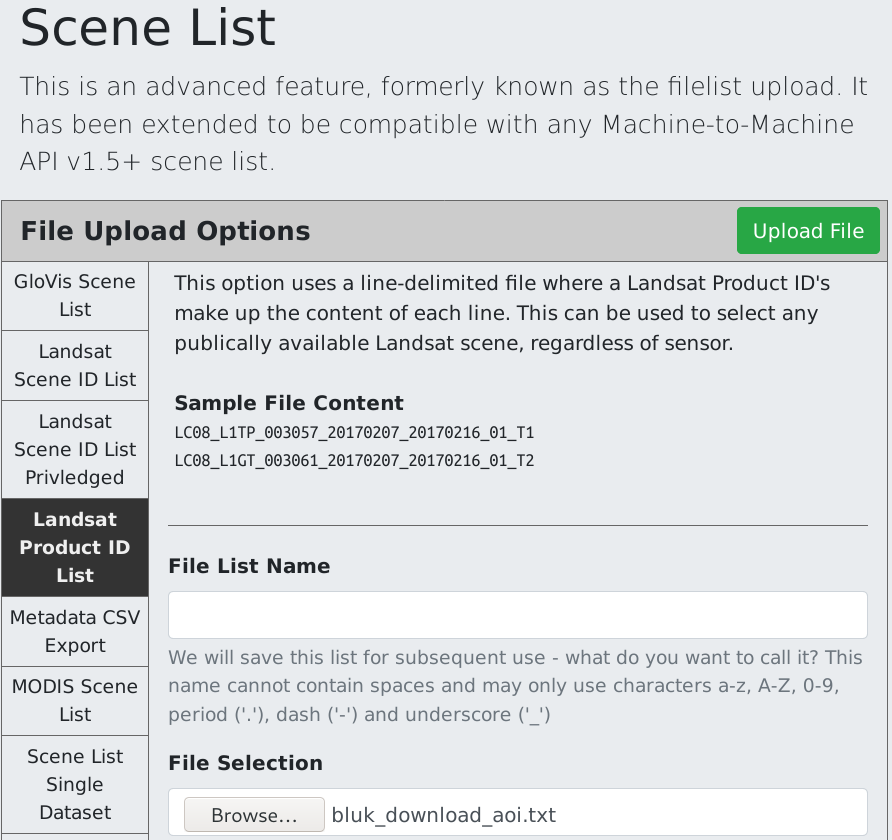
- Upload the generated Product ID listing to EarthExplorer

- Request an order of the products, then access the email and follow instructions to download the .tar.gz files (tarballs)

- With all the tarballs downloaded and located in a common directory, the next step is to bulk extract all the GeoTIFFs and place them in separate directories, for further processing
- Use aict-extract_scenes.sh and specify a new directory where you wish to place all scene directories; this directory will be created
- This Bash script has several commandline options; use the ‘-h’ option for usage information
- Next, use aict-bulk_composite.py to composite bands (batch process for all downloaded products)
- This script assumes that the output rasters are being written to a ESRI File Geodatabase and will likely do weird things if the destination path points to something else
- This script also assumes that the tifpath argument points to a directory containing extracted tarballs in their own directories. Basically, the output of aict-extract_scenes.sh
- Support for other output locations will be added in future releases.
- At this point we are done with scripts and will migrate into ArcMap for the rest of the workflow
- Support for QGIS and other systems will be added in future releases.
- Open ArcMap and load the AICtools toolbox into your catalog
- In order to carry out classification and analysis on the data we need to:
- Remove Landsat background NoData from the multiband rasters
- Mosaic the data to cover the region of interest (called Extent of Interest, or EOI, in AICtools)
- Clip the mosaic to the EOI
- All the above steps are done using the AICtools/Build Mosaic tool
- You will have to specify the coordinate system for the Mosaic (check the rasters)
2. Classification/Analysis
At this stage, you should have a set of full EOI images for multiple timestamps (typically different years). There is a lot that can be done with these images, but AICtools provides two analysis models to facilitate observation of time trends:
- AICtools/Area Trends
- Classify, select AOI, tabulate area statistics for each timestamp and output in a table
- AICtools/NDVI Trends
- Classify, select class of interest, tabulate NDVI of class for each timestamp and output in a table
Both of these tools rely on trained classification, which means that they require user-generated training samples for class definition and their associated satellite features. These training samples will need to be created manually in ArcMap before the analysis can proceed. There are many resources online that describe the steps and also the principles of created high quality training samples. Start with this guide from ESRI.